In this blog post, we’re going to take a brief dip into colour work in knitting. It’s a great way to get creative if you’re new to knitting and looking to try something new.
Today we’re going to have a quick look into stranded knitting and reversible knitting. These are just two simple ways but once you have had a go at these you can go further and get more intricate with your patterns.
Stranded knitting!
If you’ve ever seen Fair Isle knitwear or Scandinavian patterns and wondered how they were achieved, here’s a good place to start.
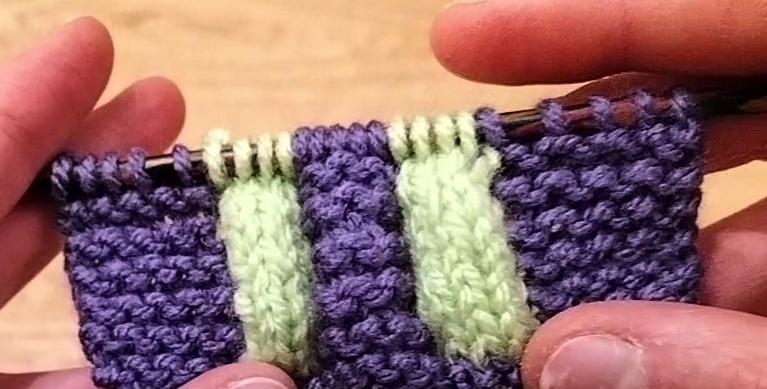
Here is a very simple look at ‘stranded knitting’, in which you keep your spare yarn (often known as a ‘float’) at the back and carry it across the stitches.
Note: it is usually better not to carry the strand across too many stitches as it may end up altering the way your piece lays.
Once you’re more experienced, you can save time when using two colours by holding one colour over each finger. But in this video, I wanted to show you a more simplified version so that you can focus on the technique itself.
For this swatch, I decided to play around by alternating between garter stitch and stockinette stitch (which is creating the bubbly/wavy texture that you can see) but stranded knitting looks lovely with complete stockinette stitch.
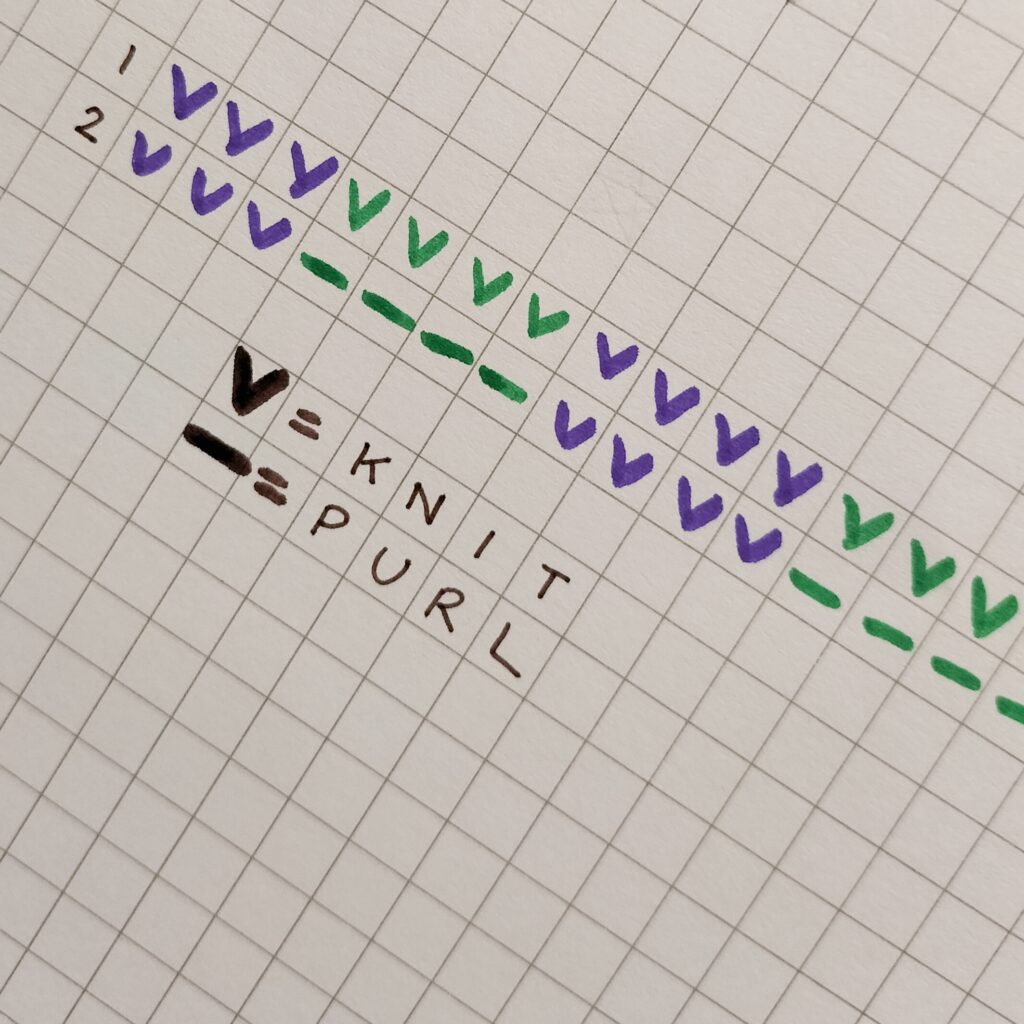
Here is a little mock-up of a pattern chart of the swatch, in case this is helpful for anyone.
Row 1 is the right side and row 2 is the wrong side or the back where the float will be carried across.
If you’re new to knitting and purling, check out my previous post for some basics!
A quick note about knitting the wrong side row! Make sure you still carry your stitches across the same side, so you will essentially be keeping the yarn in front. This should be easy to remember when you’re using stockinette stitch as you will be purling the wrong side and therefore holding the yarn in front anyway.
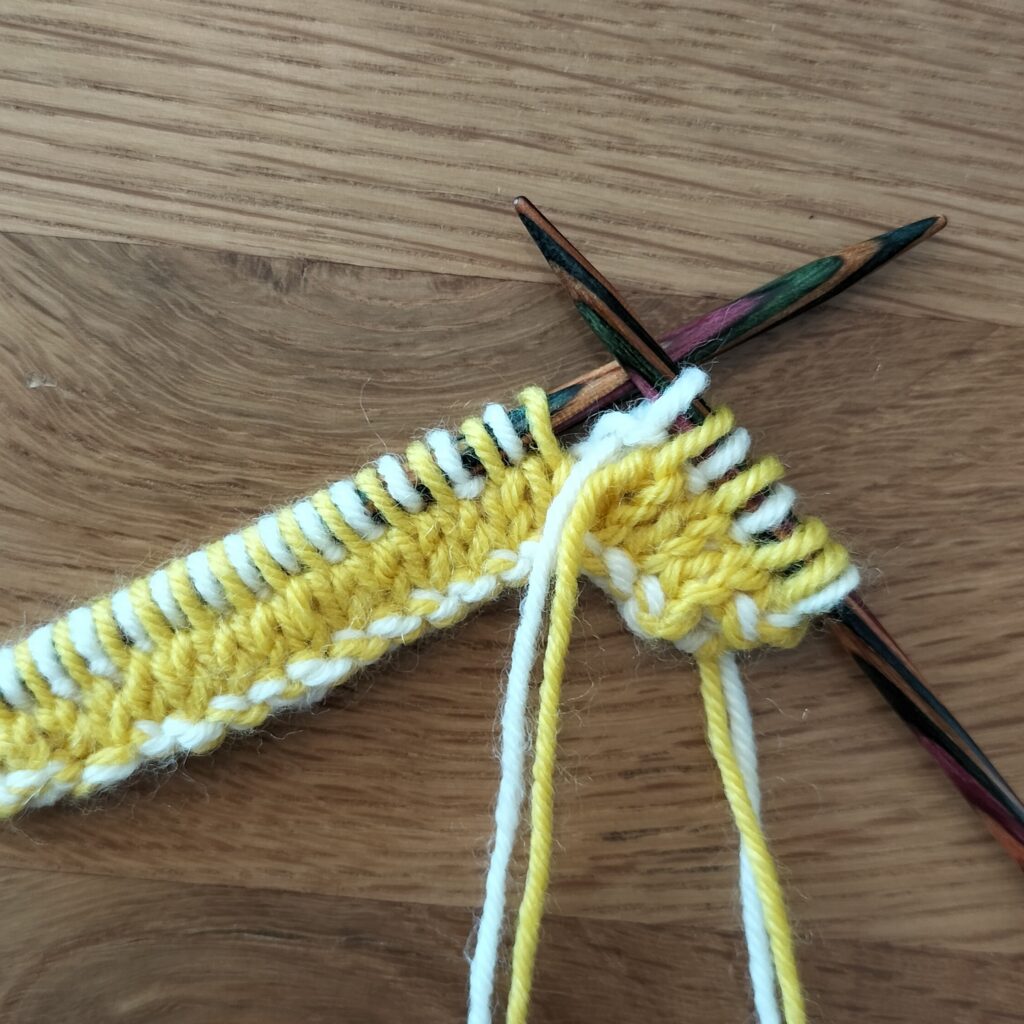
Reversible knitting!
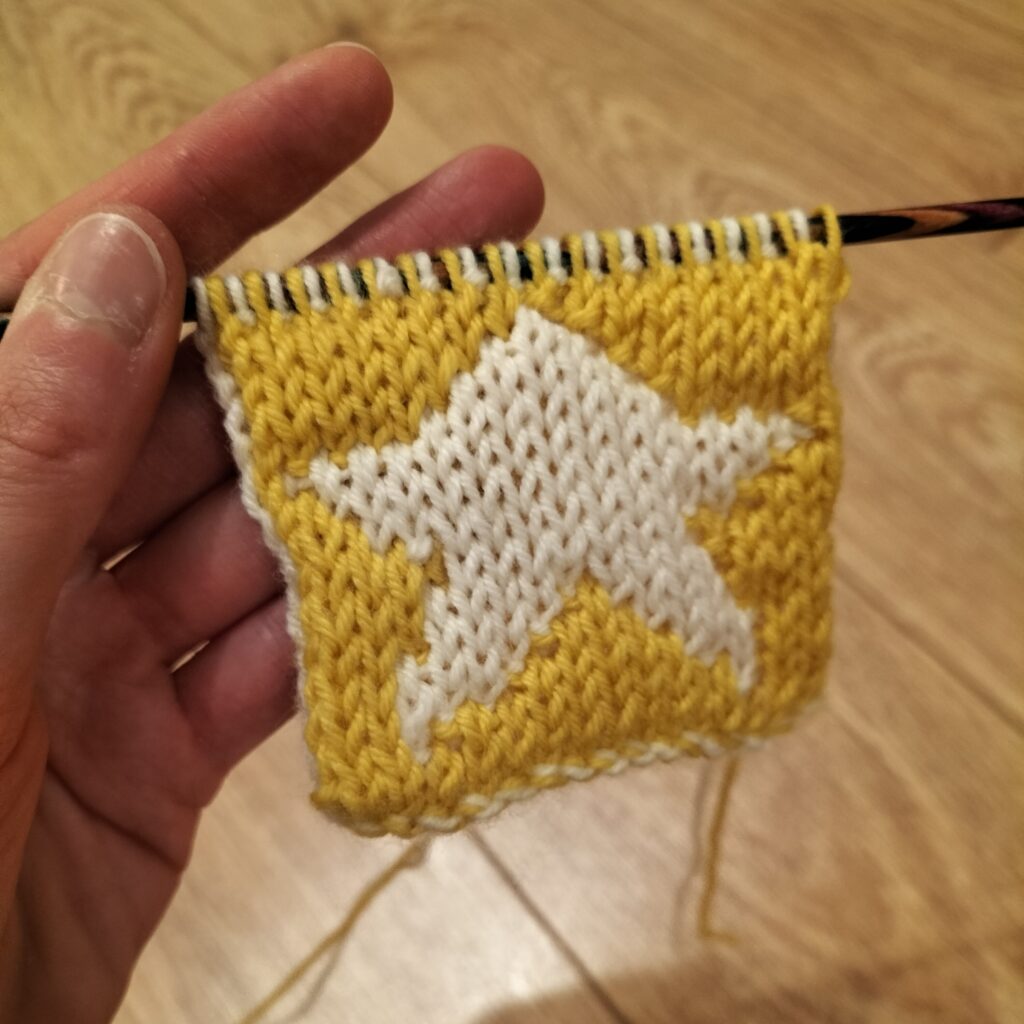
Here is an intro to reversible knitting! As you can see, this technique creates a pattern on both sides in opposing colours!
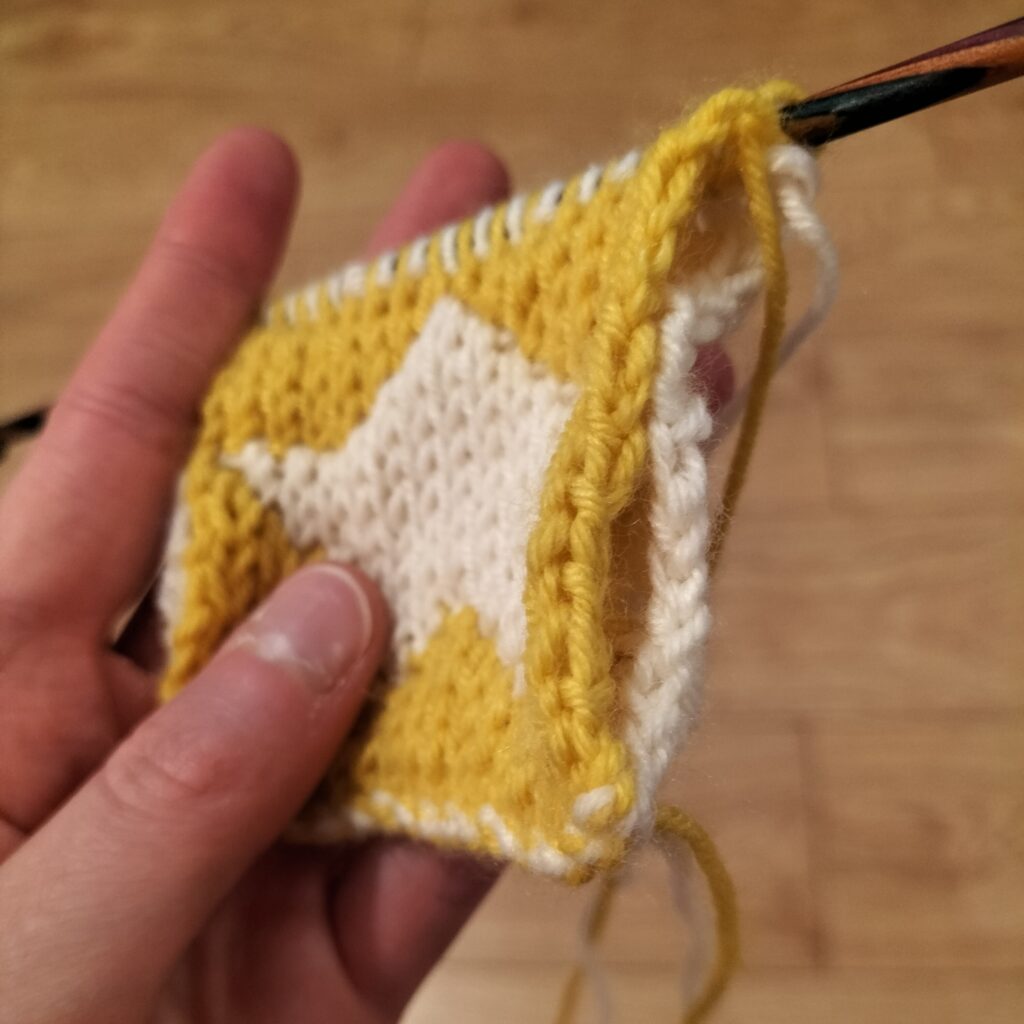
The swatch pictured is essentially a gauge test, so we can talk over this too in case you want to create your own design for this technique! (you can also find plenty of awesome patterns for reversible knits online!)
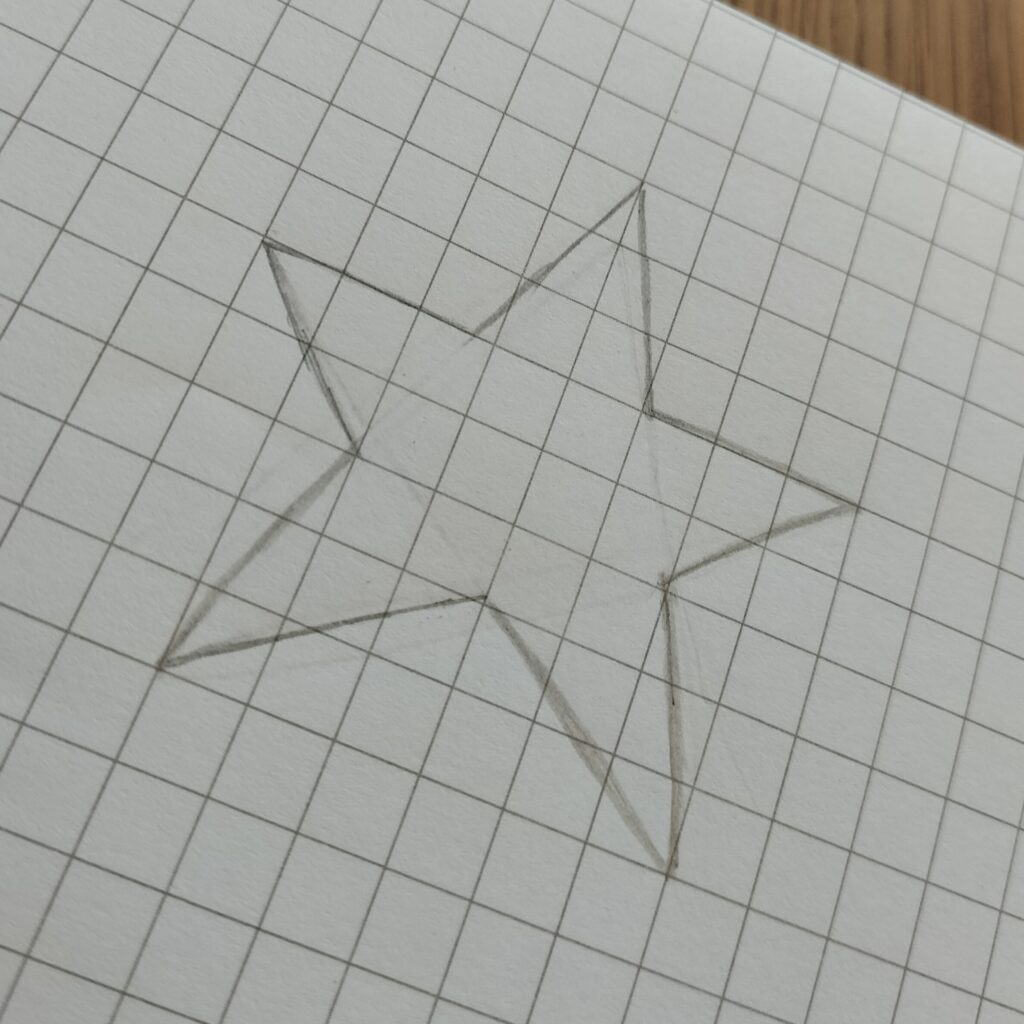
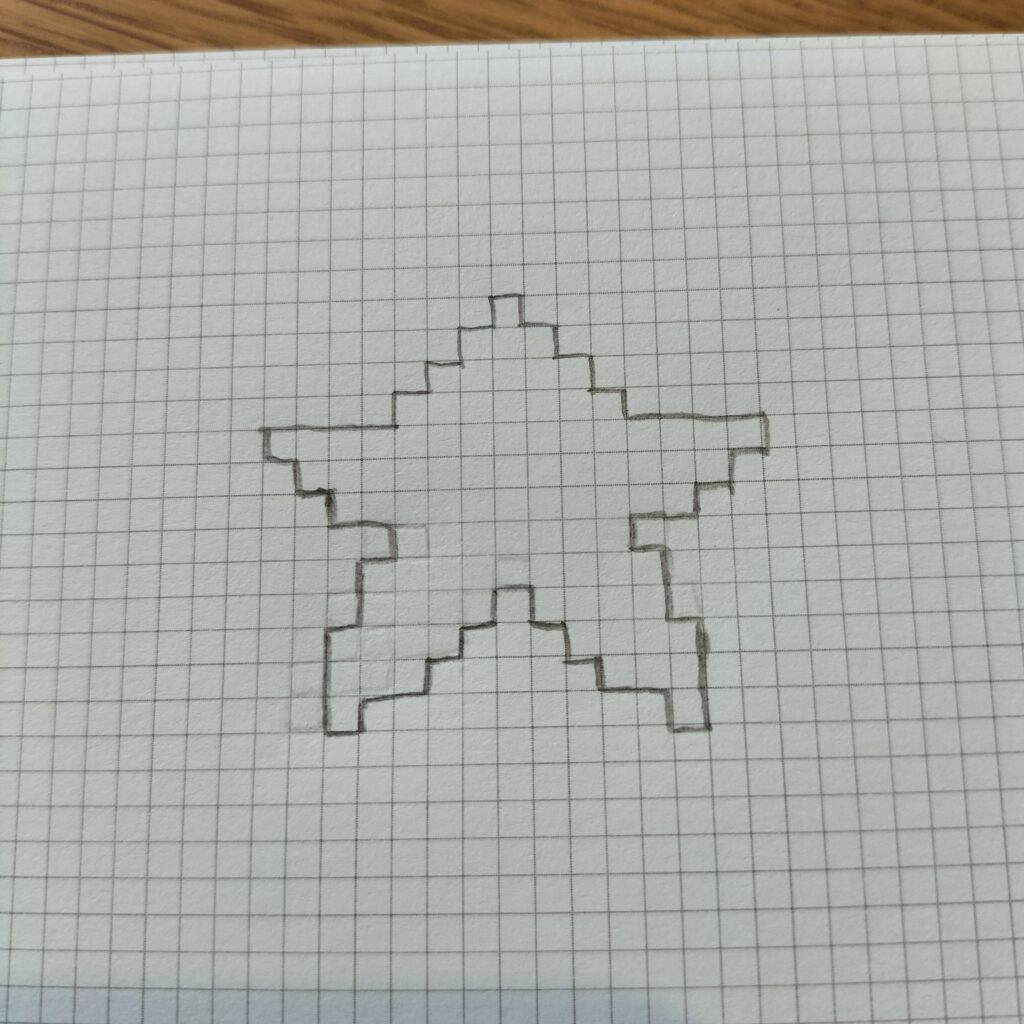
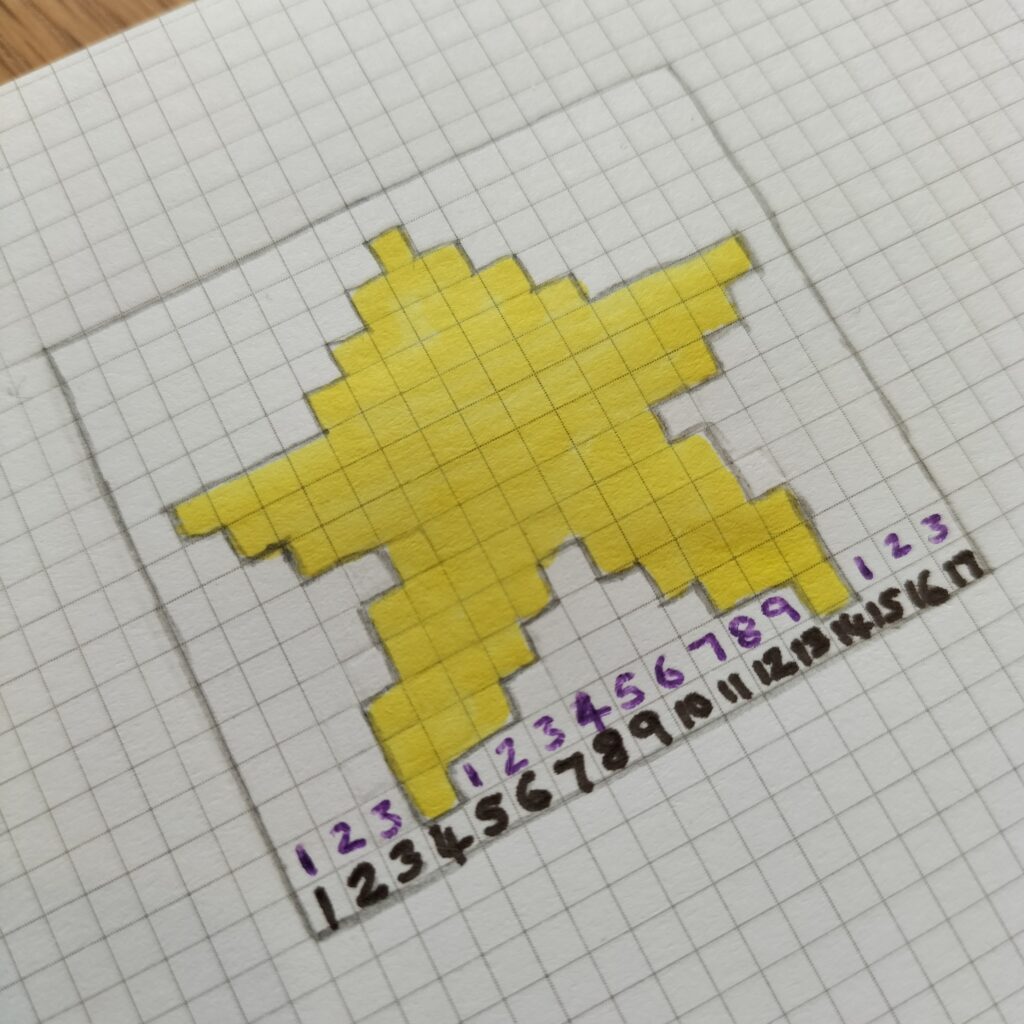
So, as a simple design, I sketched out a star. Then I transferred this onto a grid in which every square represents one stitch. As you can see, I took time to erase and readjust as I saw fit. Next, I drew out a border for the background – this can be a basis for a repeating pattern.
I think it is helpful to number the stitches (please excuse my tiny scrawl!). I also, counted out how many stitches there would be of each colour row by row so that this was all ready for me before I actually started knitting.
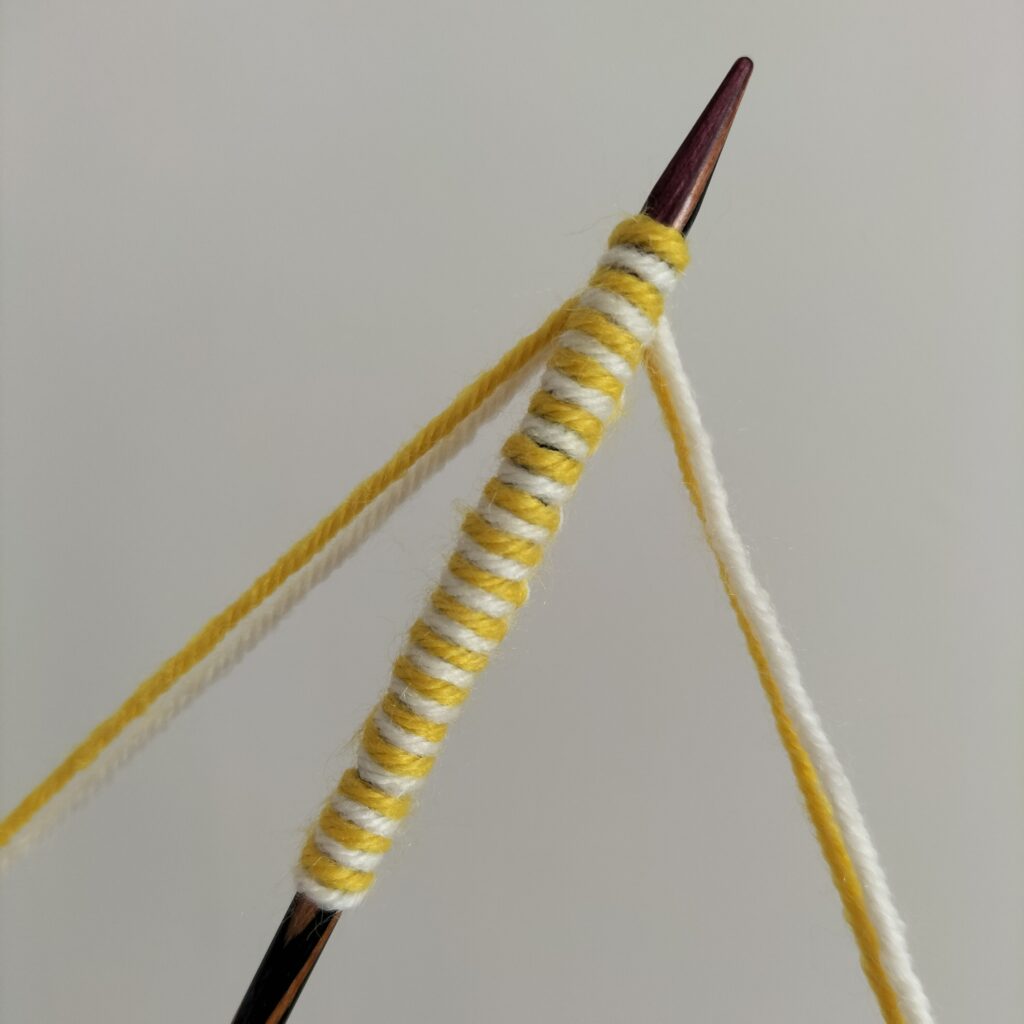
Now we cast on! I chose to use the long-tail method, which you can find a tutorial for here!
You will need to do this with two contrasting colours or shades. Try to get the stitches to alternate as pictured.
Here, the first stitch of row one will be yellow, so yellow will be ‘colour A’.
I’m going to refer you to my video tutorial now for the technique and I will continue the blog post below to bring up a few extra details to note!
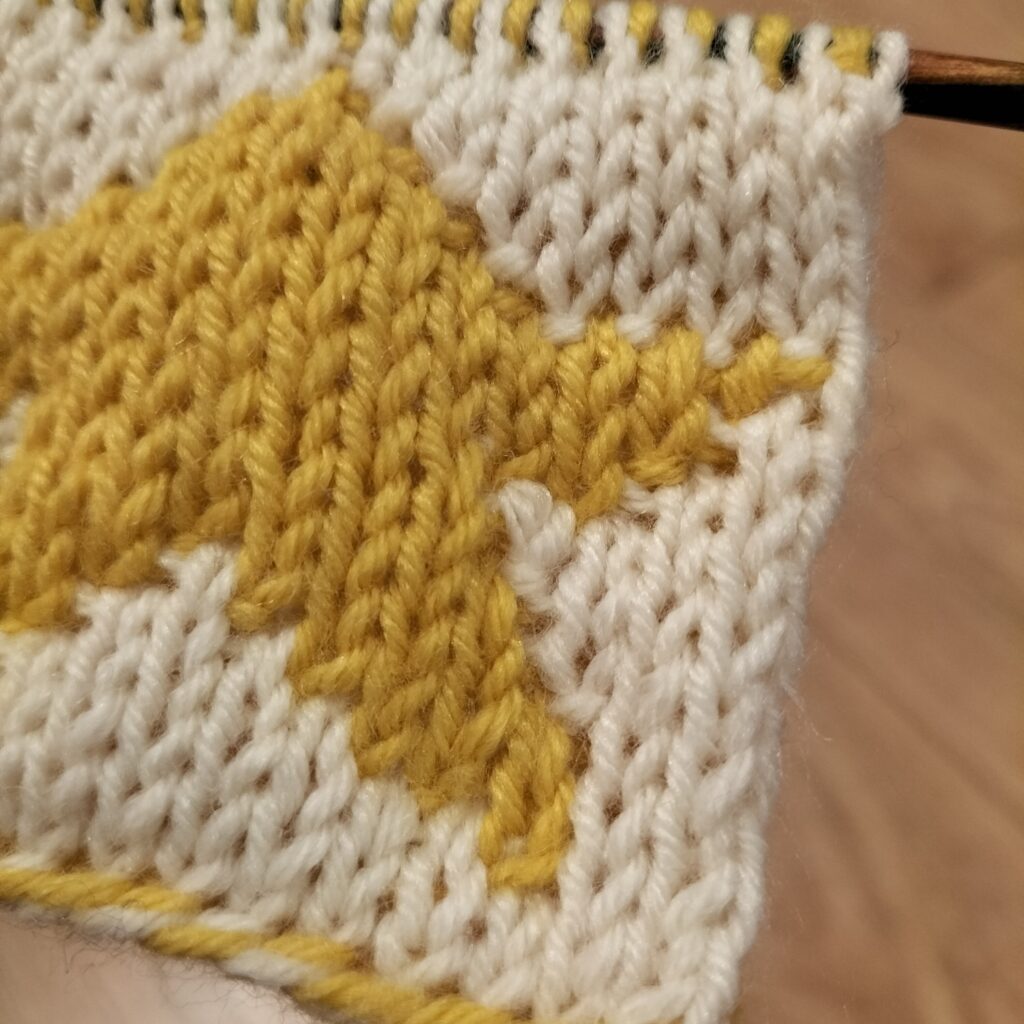
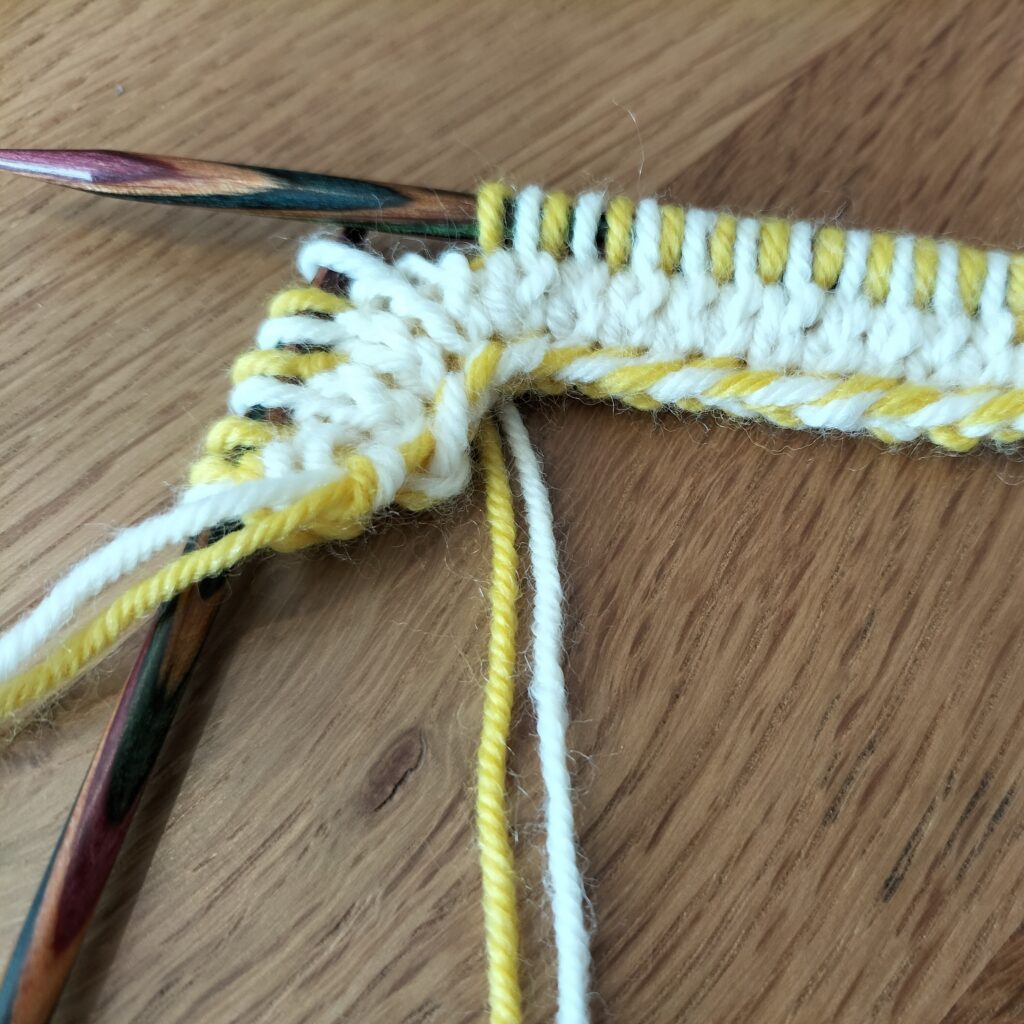
So, as discussed in the tutorial, the stitches that you knit will come to the front of the work, which is what creates the stockinette stitch pattern on both sides. When knitting the second side, because yellow was no longer our primary colour, white became colour A. And it keeps alternating like this as you carry on with your rows.
It’s essentially like knitting two different pieces at the same time back to back, which brings me to my first note…
Because of this, there will be a gap between each side of the work, only joined where the colour changes are.
So, I advise that you add a border of your choosing down each side of the piece, this can be as wide as you like and using whichever stitch pattern you desire.
I chose not to include this in my swatch so that we could focus on the technique by itself in the video.
My other note would be regarding gauge swatches if creating your own design.
So, my star was not the exact shape I was going for once it was knitted up. This is totally okay because that’s what experimenting is all about!
Knitting patterns are never going to work up the exact same shape as they look when written down, which is why you have to test them out and then adjust them.
For example, for this star, I would go back and make the top point longer and thinner and refine the other points around this to create a more elongated shape.
Another thing to note about this kind of colour work in knitting is that it is not prone to be the neatest kind of stitch pattern due to the nature of there being two layers and the fact that you have to alternate the colours from one side to another when creating the designs. But, this doesn’t take away from how fun this can be. And you can make some simple but super effective creations with this technique!
So, go out there and experiment! Get creative and see what you can make!
I’d love to see what you come up with, so don’t forget to tag @yorksireknitter in your Instagram pictures!